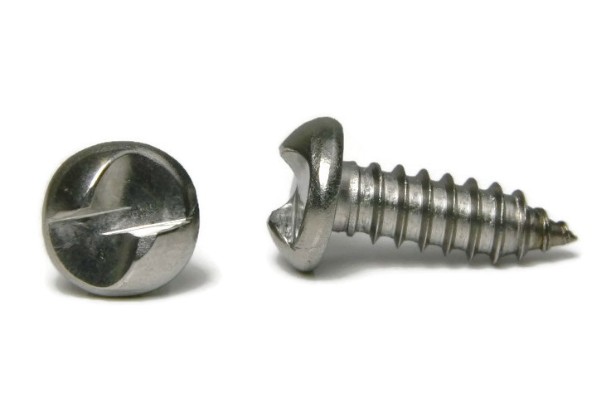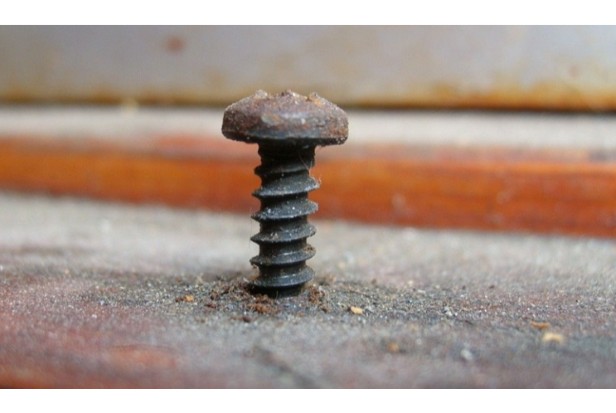
Attempting to remove a screw that was missing its entire head is probably a frustrating experience that many woodworkers have had. It can be very frustrating, especially if you don’t have any tools at your disposal to make things easier.
But don’t worry, there’s a tool-free method to remove that screw. I’ll demonstrate how to take out a screw that has broken and lost its head in this blog post.
We’ll also offer some advice on how to keep this from happening again. Stay tuned whether you’re an expert woodworker or just starting out!
Table of Contents
How to Remove a Screw With No Head
First, pay close attention to the diameter of your screw when selecting a bit for it. Next, drill the screw hole carefully so as not to overheat the bit. The next step is to insert a suitable extractor into the hole. The extractor should then be removed by rotating it properly.
Tools to Remove a Stripped Screw
The essential tools include
- Pliers
- Putty knife
- Steel wool
- Fine sandpaper
- Abrasive powders
- Drill bit
- Wood glue
- Wood dowel
- Wood plastic
- Screwdriver kit
- Cutting tools
How to Remove a Screw With No Head from a Wood Surface (step-by-step)
Removing a screw with no head may seem difficult, but you can achieve this without a headache with the right tools and procedure. An outline for doing this is provided below.
Step 1: Select Screw Extractors
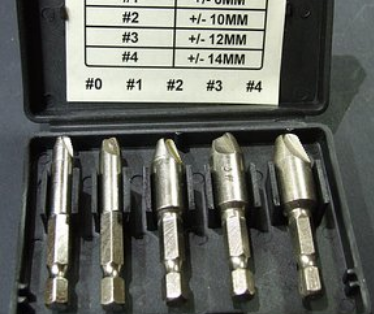
When you need to remove a broken screw, your go-to tool is a screw extractor. The damaged screws and bolts can be removed using this tool.
The extractor is made of tough steel and typically looks like a regular drill bit. You have a choice of operating techniques thanks to the square-headed top end of the extractor.
To help the extractor rotate, for instance, you could fasten the square head to a T-handle. Additionally, a locking plier can be used to grip the extractor, but the T-handle has a better grip.
The extractor’s body tapers at the opposite end and is threaded. Various extractors exist, including the spiral flute and straight flute.
Selecting an appropriate extractor that fits the screw you want to remove is crucial because these extractors are available in a variety of sizes. However, many extractors are multifunctional and capable of removing other fasteners.
It is best to purchase a screw extractor set so that you have a selection to choose from. Even for beginners, most extractors are simple to use.
Step 2: Drill a Screw Hole
Drilling a pilot hole is the next step after picking a suitable extractor. Create a hole in the middle of the screw by using a bit with a smaller diameter.
To meet your needs, many extractor set packages include different sizes. Drilling must be done gently, though, or the bit could become overheated and break.
The type of broken screw head and the size of the extractor will typically dictate how much you should drill. Additionally, you might need to apply a few drops of cutting fluid before drilling to avoid overheating the drill bit.
Step3: Hammer the Screw Extractor
What should be done now that the pilot hole has been made? A suitable extractor should have a grip attached. It might be a handy T-handle or locking plier. Once the extractor is in the pilot hole, tap it in with a hammer while applying sufficient pressure.
Step 4: Remove the Screw
Once the extractor is firmly seated in the pilot hole, tighten it in by turning it like a screw. As a result, the extractor’s tapered end penetrates the broken screw and securely fastens to the head or shank.
The extractor has reverse threading, which elevates it to the status of an intriguing tool. As a result, turning it counterclockwise releases the broken screw, allowing you to eventually remove it by hand from the hole.
There is a specific kind of extractor with saw-cut tooth heads that resembles a hollow cylinder. This extractor works like a standard drill. You must position the hollow extractor so that it is centered around the headless screw before digging.
It consequently pierces the surrounding material, removing both the broken screw and the wood. Afterward, you can patch the wood with wood fillers or fill screw holes in the wood.
If the screw is still difficult to remove, you could try heating it with a blowtorch or other suitable heat source. After that, you can lubricate the thread and, after it has cooled, try using the extractor once more.
Keep in mind that the screw is your main target, so take care not to use heat to harm the metal or wood surfaces.
Step 5: Sanding
Sand the wood’s jagged edges after extraction. A sanding block or high-grit sandpaper are options. After sanding, wipe away any remaining wood dust with a damp cloth and let the wood dry completely.
For even better results, paint the surface after that. Sanding is an option for both removed screws and screw holes that have been properly filled.
How to Remove a Broken Screw Without An Extractor
Using Screw-extracting Pliers
Use pliers to remove the screw if the shank is exposed enough to be grasped. Locking pliers are the preferred tool for this method, which is still one of the simplest and most dependable.
When you can turn out the shank with even the smallest portion of the shank, the work is finished. However, patience is a must when using this technique.
Using Rubber Bands
Rubber bands are useful tools to help pull a screw out when the screw’s head is missing. Rubber bands can be extracted from or partially loosened thanks to their grip.
Put a thick rubber band over the screw after obtaining one. Then, using a suitable screwdriver, gently turn to unscrew.
As only a small portion of the shank is removed, using a rubber band occasionally may not be the best solution. The task can be finished using a plier, so don’t worry.
Using Wood Plug Cutters
The hard way can be used if the screw is embedded deeply into the wooden surface and is therefore out of your reach. The cutter for wood plugs is a clever removal tool, resembling hollow cylinder extractors with saw-cut teeth.
Using a wood plug cutter, you can drill a hole into the wood next to the screw. The shank can now be seen and grasped as a result. It can then be removed from the screw hole using a locking plier or a drill chuck.
Using a Chisel
Chiseling the surrounding wood is a different option for removal. A countersink can be made around the screw with the aid of a chisel.
It can be removed using a nose plier and the countersink. You can also use an unlocking agent to make removal easier.
Use An Impact Driver
Imagine you have an impact driver, a manual tool. It is fantastic for assisting you in resolving a threaded screw issue. Make sure your Impact driver is made of high-quality materials, though. Please choose the proper screwdriver bit—flathead or Phillips—before inserting and tightening it. Next, clear away any debris from the screw head to check that the bit is pointing in the right direction and prevent further tightening by doing so. Before starting to insert the impact driver bit tightly into the broken screw head, please put on your safety glasses for your protection. Start repeatedly striking the impact driver’s handle end with a hammer. Following that, the bit will snugly fit into the screw head, the impact head will start to rotate, and the screw will subsequently become looser. The screw can now be fully removed using a drill or a screwdriver.
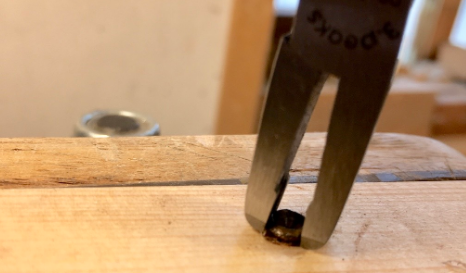
Using Pliers Or Vice-Grips
Using a plier or Vice-grip can be a great idea when you come across a stripped screw that is not completely buried in the surface you want to work on. Use one of these tools to clamp down on the stripped screw head and start turning it. Please be very careful to avoid scratching the surface where the screw is placed. This is due to the possibility that the jaw of your working tool will scrape the surface.
reverse order, the extractor will begin to turn the screw in reverse and back it out.
Use of a Manual Screwdriver
If you come across a screw head that keeps causing your screwdriver bit to slip, kindly try this manual screwdriver method. Grab a hammer and start tapping the annoying screw head with the screwdriver firmly lodged in place. This will give you the extra grip you need to turn your fastener, especially if soft metal was used to make it. If the first solution fails, use a rubber band or piece of duct tape, positioning the adhesive side against the screw head. Use one of the two to cover the screw to improve your grip, and then use your screwdriver to press the material into the hole. Use a flat-headed screwdriver as a possible alternative if you’re using a Philips head screwdriver. In order to properly fit it into the Phillips head hole, look for one that is narrow. Using the aforementioned duct tape or rubber band method, you can complete it quickly.
Using Liquid Friction
Every day, technology advances, and specialized products are created to make it simple to remove stripped screws. You can ask for any other comparable products that serve the same purpose in your area or locate Screw Grab and DriveGrip. Applying this liquid friction to the stripped screw will increase the resistance between the screw and the screwdriver. It functions much like a rubber band and works best with stripped screws that have not penetrated deeply into the surface.
Using a Rotary Tool
When all other options have failed, a safe option to try is a rotary tool. You can start by securing a tiny cutting disk on the rotary tool, says House Tipster, and then cut a thin slot into the screw. Make sure the slit you made is large enough to accommodate a flathead screwdriver. Additionally, it must be thin enough for the screwdriver to grasp it securely. If your screwdriver does not fit in the slit, enlarge the slit further. However, do not make any major cuts that would affect the slit; if you do, the screwdriver won’t be able to catch and turn the screw. Please be aware that the rotary tool can cause loose metal shavings to fly around the surface when in use. Please make sure to put on your safety glasses as a result.
Read more: 5 Ways to Remove a Stripped Hex Head Screw
What Causes a Broken Screw Head?
A screw doesn’t just break; there are a number of factors involved. Stress, rust, age, and pressure are a few of these elements.
Too Much Stress
Everything that is consumed in excess has negative effects. It might break if one area is overstressed. It has a maximum load capacity, just like every other item, and when this limit is exceeded, the item starts to stretch, deform, and eventually break.
This frequently occurs when a tool is used that is the wrong size, such as when a flat screwdriver is used on a Phillips screw or when a screwdriver is used that is too small.
Pressure
Both manual and electric screwdrivers can break if too much force is applied. Make sure to control the amount of pressure you apply when using your screwdriver, especially if it’s an electric one.
Rust
When exposed to atmospheric substances like oxygen, water, acids, or organic chemicals, screws frequently rust. They consequently become feeble and break easily.
The material from which they are made, however, determines how quickly they rust. For instance, stainless steel is more corrosion-resistant than brass materials.
Age
As a result of accumulated wear and tear, screws typically degrade over time. Fatigue sets in as they get older and can be brought on by corrosion, pressure, and overstress.
They become less effective as a result, and they become more prone to breaking.
Covering the Screw
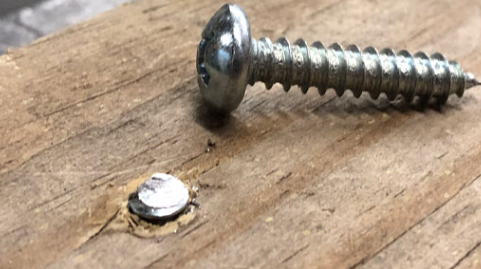
Why not just use cover it if removing the screw is proving to be so challenging? You can cover broken screws in a variety of ways, the most popular of which is with wood fillers, so yes, you can.
Picking a quality wood filler is necessary for covering screw holes. Then, using a putty knife, you can apply to the broken screw and essentially get a “filled” surface. If you do it neatly, you could pull this off.
You can use scrap wood to fill holes instead of the wood fillers you can buy at hardware stores. If the initial results are not what you were hoping for, don’t be afraid to add more wood filler. Just be careful not to overfill the hole; add only a little.
Another option is to cover the broken screw with a patch to create a patched area. This can be used to cover nail or screw holes. The goal is to conceal the screw hole, just like with wood fillers.
For both a filled and patched area, a spot that is completely invisible can be painted.
If you decide to replace the broken screw, you can also paint over a new screw to make it undetectable. Pick your preferred paint color, which is frequently one that complements the color of the wood.
Dangers of Broken Screw Heads
You have to remove screws with broken heads from wood surfaces quite frequently. Broken screw heads can cause a number of issues and reduce the effectiveness of fastening.
The first problem is that if you fix it in the wrong place, it is extremely difficult to remove or replace it without the proper tools. Additionally, the affected area might be rough if you do manage to remove it.
The surface into which the screw is inserted may also be harmed by the broken screw head, particularly if the wood is thin or weak. In addition, the wood might not have a smooth surface if you choose to cover it.
Conclusion
A common issue at home and in the furniture workshop is removing a screw without a head. But there are a number of ways to get it out without doing more harm than necessary to the object or the surface.
Remember that screws can break or become stripped for a number of reasons. The issue, which is challenging to fix, is caused by oxidation and rust from atmospheric agents, pressure, and age.
FAQs
How to Unscrew a Stripped Screw?
Using a wire brush, first remove any rust that may have caused the stripped screw if it was caused by corrosion. Then, you can spray an unlocking agent to facilitate removal. Then, after giving the unlocking agent some time to work, carefully unscrew with a suitable screwdriver.
How to Remove a Broken Screw in a Wall Plug?
The visible portion of the plug inside the wall should first be heated up to almost melting point. Then, using the screwdriver’s tip, you attempt to melt it, fusing the plug inside the wall into a single body.
How to Extract a Broken Screw from Wood Without Wood Glue?
Before using an extractor, drill the broken screw. Unscrew the broken pin by turning the extractor.
How to Unscrew a Headless Screw?
Use a hacksaw to cut the screw’s head, then a flat-blade screwdriver to remove it as an alternative to trying to remove the screw.
There are always screw holes left over after removing screws. These screw holes can be filled with wood fillers or a patch to create a filled hole.
How Do You Get a Screw Out of Metal Without a Head?
Drill a minimum of the length of the screw. Use an awl or nail punch to wiggle the screw loose enough to grip with needle-nose pliers and pull free. Now that the ragged holes have been cleaned up with a 1/2-inch drill bit, you can fill the new hole with a dowel or plug (or both, if the screw is long), and then seal it.