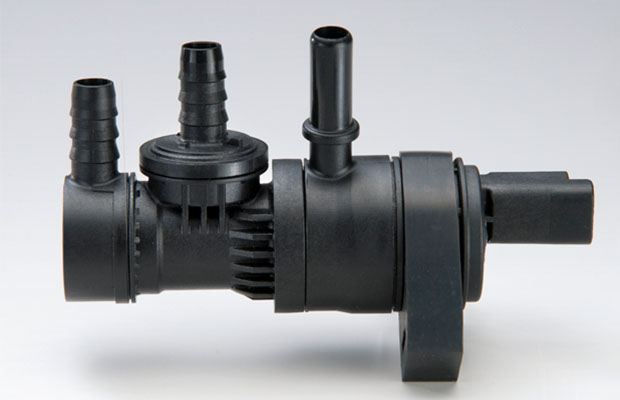
The vehicle’s EVAP system has a purge valve for controlling evaporative emissions.
What is a purge valve? A purge valve is an essential part of a vacuum material conveying system that not only offers an on/off flow of material into a conveying line but also a method of purging that conveying line with air at the conclusion of each material loading cycle.
Continue reading so we can explain what purge valves are, how they work, and why they break down. Let’s dive in!
Table of Contents
What Is A Purge Valve?
An automobile part called a purge valve is in charge of controlling emissions. It enables the engine to draw precisely the right amount of fuel vapors from the EVAP charcoal canisters into the engine intake manifold.
The purge valve is electrically controlled by a solenoid in contemporary automobiles. When the engine is running, a purge valve is open; it closes when the engine is turned off.
Some fuel vapors from the charcoal canister can be moved to the engine and burned there thanks to a purge valve. The monitoring of the purge flow is carried out by specific Sensors. When the purge flow is lower or higher than expected, the check engine light also helps to provide an indication.
How Do Purge Valves Operate?
The purge valve includes a component that regulates material flow. The purge valve of a vacuum conveying system is not activated when it cycles on to meet a demand for material, leaving the material valve open to let resin flow from the source to the destination. Following the release of the required amount of material, the material valve closes and an air-purge port is opened, allowing the valve and conveying line to draw in a large amount of air. This rush of air flushes the valve and conveys the line to the receiver at the destination, removing any residue that might otherwise contaminate or stain the next material that passes through. The vacuum conveying cycle ends once this purge is finished.
It should be noted that a purge valve’s air-purge port can be connected to either a flow of dry air or to ambient air (drawn through a filter on the air inlet). Moving dried materials to processing equipment from a resin dryer or storage hopper requires the use of dry airflow. Existing conveying systems that require the ability to purge air can be retrofitted with purge valves.
Common Purge Valve Problems
The purge valve’s most frequent issue is when it sticks or doesn’t fully close. This may cause the “Check Engine” light to come on. After filling up at the gas station, some cars may have trouble starting because the purge valve is stuck open; the engine may sputter and run rough for the first few seconds.
In many cars, purge valve issues are frequent. In some Hyundai models (Elantra, Santa Fe, Tucson, Tiburon), a stuck-open purge valve is fairly common to cause the “Check Engine” light with the code P0441.
Similar issues are fairly typical in many European automobiles, including Audi and Volkswagen. The code P0446 and other EVAP codes may appear in some Ford and Mazda vehicles due to a bad purge valve.
Some GM vehicles frequently have purge valve leaks. Purge valve warranties have been extended for some vehicles.
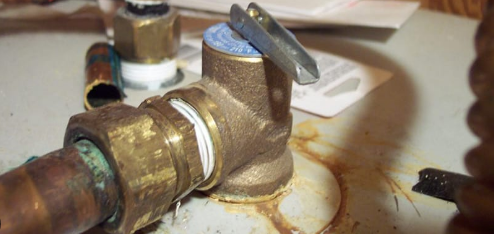
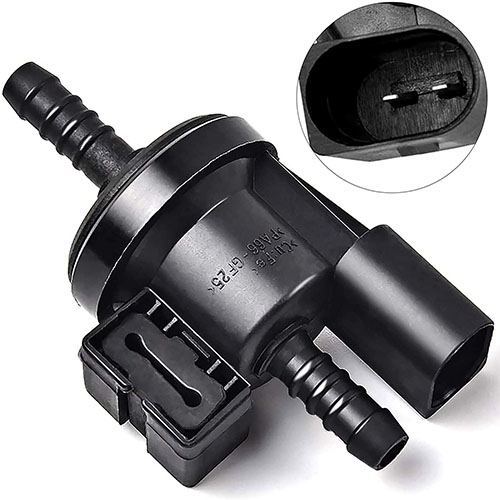
The purge valve costs between $35 and $65, and replacing it is not too difficult. It is typically fastened to the engine or intake manifold of cars. View this image of a purge valve from a Jeep Grand Cherokee, as an illustration.
Steps To Test Purge Valve With Multimeter
How to test a purge valve with a multimeter is explained in detail in the following steps.
- Remove the clamps holding the purge valve to the fuel tank and engine on both the outlet and inlet lines.
- For at least 30 minutes, let your car idle.
- Confirm that continuity mode is selected on your digital multimeter before using it; if you touch the probes, the meter will sound audible.
- The power connector for the purge valve must be connected to the probes. The purge valve is operating flawlessly if you begin to hear a sound. Many purge valve devices are solenoid in design, which means that the positive and negative power terminals are connected by copper and metallic coils housed inside their casings.
- The purge valve needs to be urgently replaced if there is no audible sound, which indicates that it is damaged.
Testing The Purge Valve Ohm Meter Readings With Multimeter
- Turn on the ohm-meter setting so you can see the number on the multimeter dial.
- Put it on the power linkage for the purge valve and attach two lead probes to it.
- Check the digital multimeter for readings. The purge valve is in good condition if the readings range from 14 to 30 ohms. A purge valve replacement is required immediately if it is outside of that range, which indicates a problem.
What Are Symptoms Of A Bad Purge Valve?
It’s likely that a check engine light will come on when your purge valve breaks down or begins to malfunction. The check engine light will turn on if the vehicle’s computer detects an unusually high or low purge from the valve. Other common symptoms of a failing purge valve include:
Poor Fuel Economy
It may be possible for fuel vapors that your vehicle actually needs to burn to escape if the purge valve isn’t working properly. The vehicle’s fuel economy will decrease because it will take more fuel to generate the same amount of power.
Engine And Performance Issues
A vacuum leak could form if the purge valve is stuck open. This implies that air can enter the combustion chamber at unanticipated levels, messing up the air-fuel ratio and leading to problems.
What Is The Cost To Fix Bad Purge Valve?
The good news is that repairing your purge valve won’t cost a fortune. A broken purge valve will generally cost between $100 and $200 to repair. The majority of that cost is in the parts, where the typical cost of a replacement valve can reach $100.
How To Replace Canister Purge Valve?
Here is a step-by-step tutorial that will show you how to replace a canister purge valve.
1. Disconnect The Vehicle’s Battery
The electrical power terminal of your car’s canister purge valve is connected to the device, which supplies electricity for basic operations like on/off switching.
Because of this, you have to turn off the power source before changing the purge valve. Remove the positive and negative cables from the battery to accomplish this.
2. Locate The Canister Purge Valve
The canister purge valve is typically found above the engine or to the side of the fuel system in most cars. Your canister purge valve is connected to two vacuum lines and an electrical harness.
The fuel injector rail is where one of these lines connects, and the EVAP canister, which is close to the fuel cell, is where the other line is connected.
Before you remove a canister purge valve from the connections, make sure it is the same as the replacement purge valve if you find one.
3. Disconnect The Wiring Harness
Disconnect the electrical harness that is attached to the canister purge valve after finding it.
4. Take Out The Vacuum Lines
Marking the positions of each vacuum line to make sure they are not installed backward is a great tip that experienced mechanics are aware of.
Note: Mark the vacuum line that is fastened to the various male fittings using masking tape in various colors or even two zip ties in various colors.
Once you have clearly marked them, remove them in accordance with the instructions in the vehicle’s manual.
5. Disconnect The Canister Purge Valve
Typically, a bolt with a 10mm diameter secures the purge valve to a bracket near the fuel injection rail or the firewall. Remove the bolt, then take the purge valve out of the car.
6. Install The New Canister Purge Valve
The removal of this component is followed by its installation. While you should always refer to your vehicle’s service manual for specific instructions, keep in mind these general guidelines.
If the old vacuum hoses on the canister purge valve are damaged, attach new ones.
Install the new purge solenoid by using the bolt to secure it to the bracket. After connecting the electrical harness, attach the vacuum lines using the appropriate male fittings.
Make sure to double-check your vacuum lines to make sure they were installed properly after the canister purge solenoid has been properly installed on your car. Poor installation can seriously harm engines.
7. Clear Error Codes
On the appropriate positive and negative terminals, reattach the battery cables. Start your car after that, and using a scan tool, eliminate all error codes.
8. Test Your Vehicle
Allow the car engine to warm up as you start it until a comfortable operating temperature is reached. Check to see if the dashboard check engine light is not on; if it is, turn off the engine and run a diagnostic test.
Turn off the engine after making sure that none of the lights, including the Check Engine light, are on. Then, take off the gas cap. This test will verify that the vacuum is operating properly.
The vacuum lines leading to the canister purge valve may be crossed if you remove the gas cap and notice a significant amount of vacuum pressure.
How To Clean Purge Solenoid Valve?
you can clean There are two ways to purge solenoid valves, depending on your technical level of expertise and how dirty the valve is.
Here is a step-by-step guide to show you how to clean purge solenoid valve using 2 methods
How To Clean Purge Solenoid Valve Without Opening It
- Pour enough Carburetor Cleaner or Mass Air Flow Cleaner into the purge valve’s two tubes.
- Using your fingertips, cover the ends of the tube after spraying the cleaner, and then give it a good shake. After a few minutes of doing this, the cleaner should have completely cleared the tube of debris.
- Keep the tube closed, open the tube ends and let the cleaner completely drain out of the tubes after at least 30 minutes. The drained liquid would appear dark and speckled with debris, charcoal, and dirt. Repeat Steps 1 and 2 several times. When the drained liquid is clear and clean, this should show that the valve is clean.
- When spraying the contact cleaner, turn off the connector valve. Let everything dry completely after that.
How To Clean Purge Solenoid Valve By Opening It (Deep Cleaning)
If you are unfamiliar with the procedures, don’t try to thoroughly clean your purge solenoid valve. In any case, a screwdriver or small knife can be used to open a purge valve.
- The two halves of the majority of purge valves are joined by glue. Remove as much glue as you can, then start by doing so. After the glue has been removed, you can safely split the casing in half at each end by breaking it apart, but be extra cautious.
- One half of the purge valve has a small cap-like round piece on it, and the other half has all the functional parts, including the solenoid. These are both visible after you have separated the two halves. you can then remove the valve’s body from the casing.
- Check the O-rings and the rubber components for damage. You can attempt to lubricate them with silicone grease if they’re in good working order and condition.
- On the solenoid’s interior walls, apply the Carburetor Cleaner or Mass Air Flow Cleaner. Rub the openings with the help of clean cloth for a thorough cleaning.
- After cleaning is finished, seal the case with rubber or adhesive. Make sure to properly reassemble everything after using rubber or sealant to seal your valve because it might be challenging to separate the two sides of a sealed valve. Allow the rubber or glue to dry after you’ve sealed the valve.
Read More: What Is Check Valve?
FAQs
Can I Ignore A Broken Purge Valve?
Driving while having a broken purge valve is certainly possible, but we don’t advise it. The longer you drive with a bad valve, the greater the chance you have of breaking the EVAP system and other components of the car. Additionally, there’s a chance of wasting fuel and emitting more emissions than necessary. Man, consider the turtles here.
How Challenging Is It To Fix The Valve By Myself?
It shouldn’t take more than a couple of hours to repair or even clean a purge valve because the procedure isn’t very involved. Having said that, you must become familiar with an OBD-II scanner and have a working knowledge of the various wiring and harnesses found inside your car. You can get started by picking up a car repair manual.